
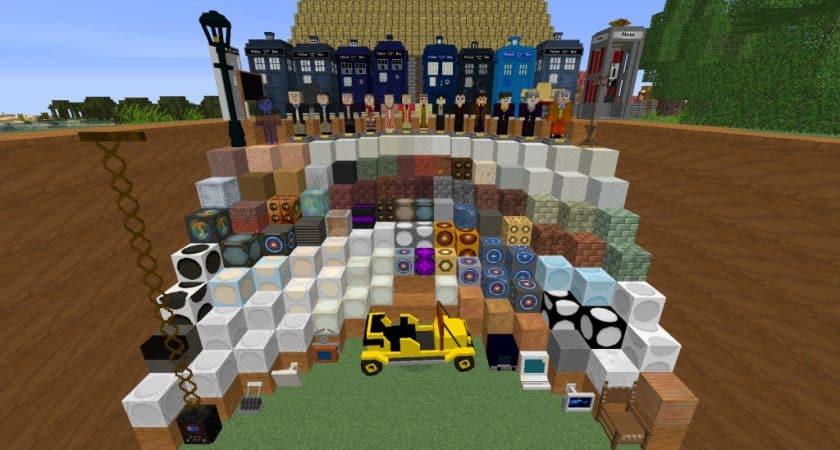
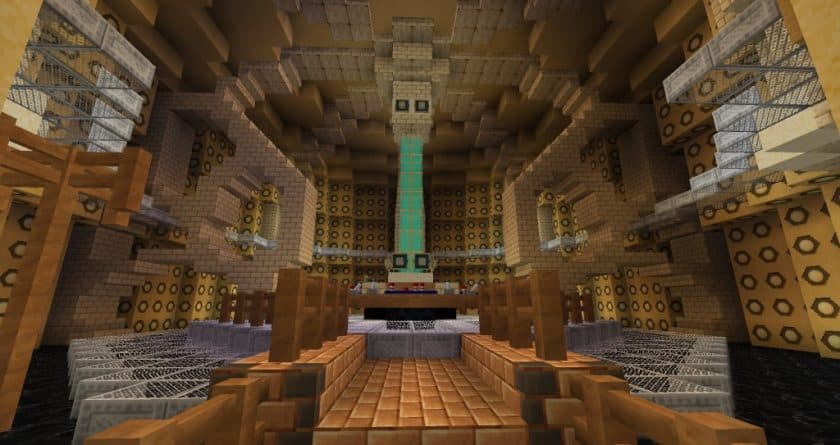
Embark on an epic journey through space and time within your Minecraft world, all thanks to the Doctor Whovian Resource Pack. This isn’t just another texture pack; it’s a heartfelt homage to the legendary British TV show, Doctor Who, crafted by a passionate fan who wanted to share their love for the series with the wider Minecraft community. Stepping into a world with this pack active feels immediately different, as if the TARDIS has just materialized around you. The visual vibe is distinct, moving away from Minecraft’s default aesthetic to embrace a more detailed and immersive sci-fi atmosphere.
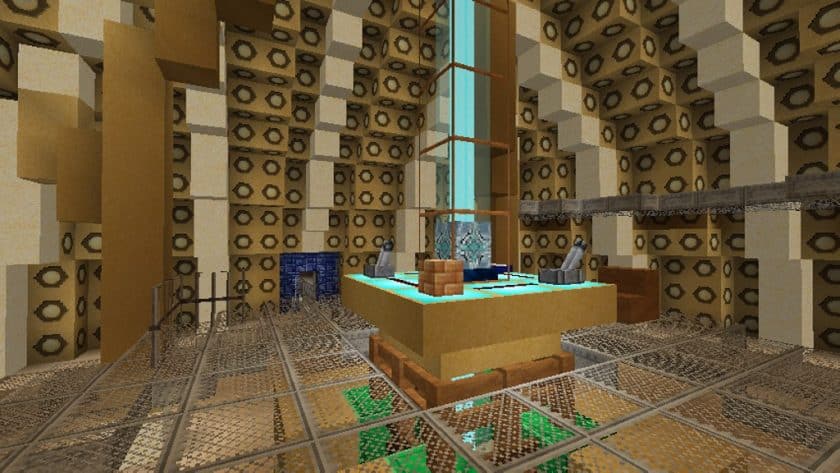
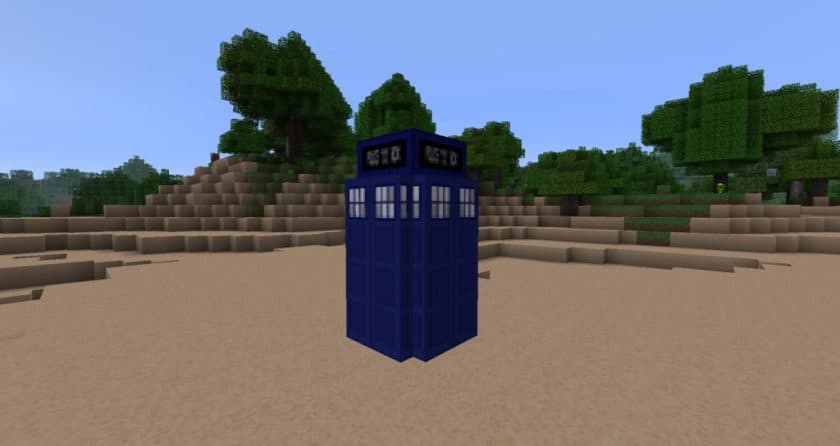
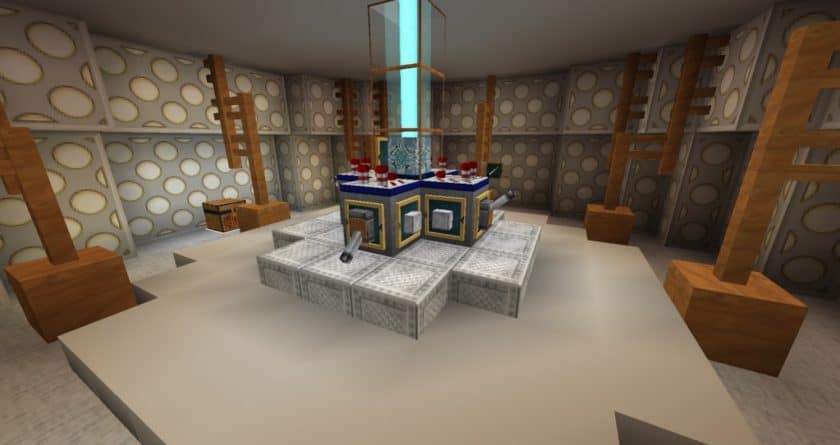
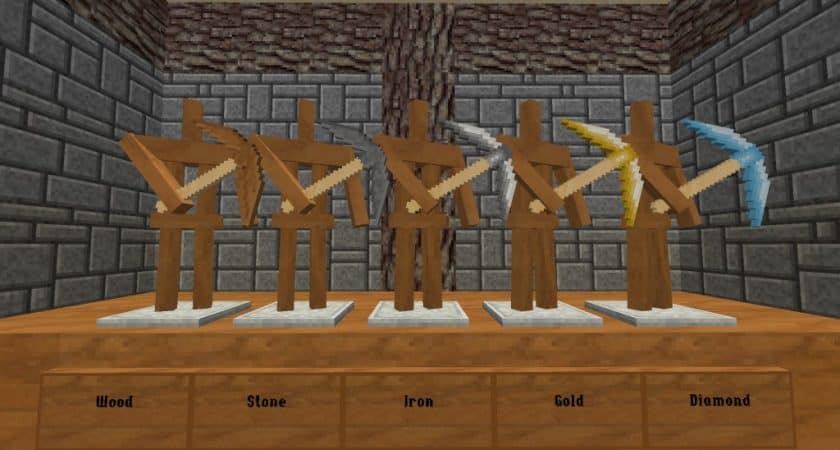
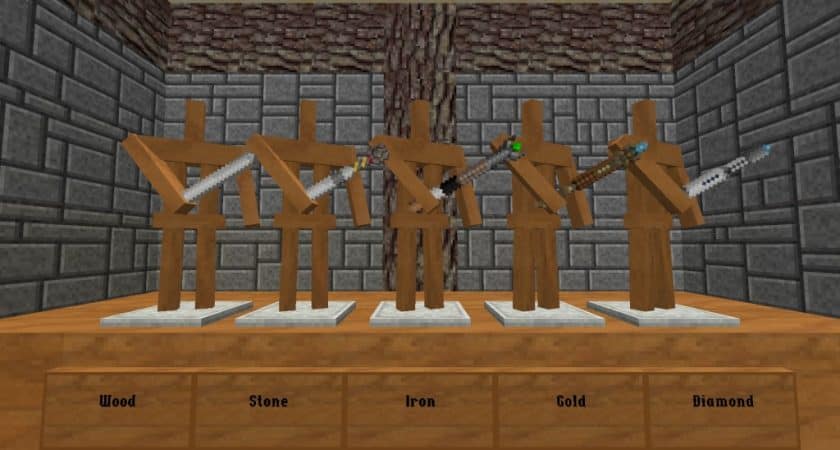
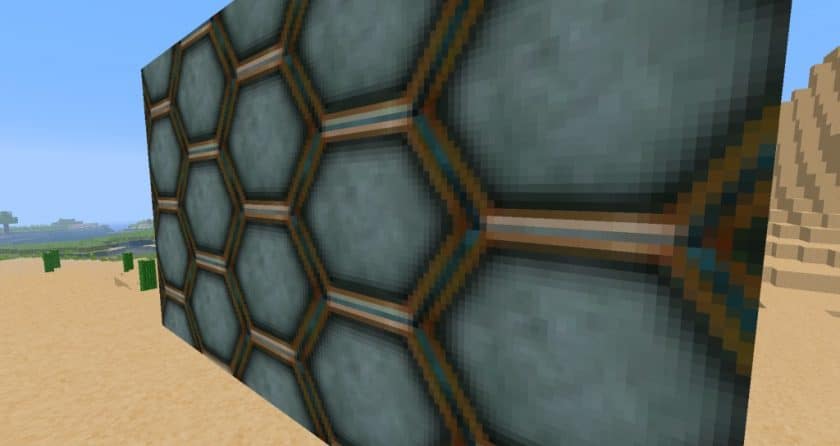
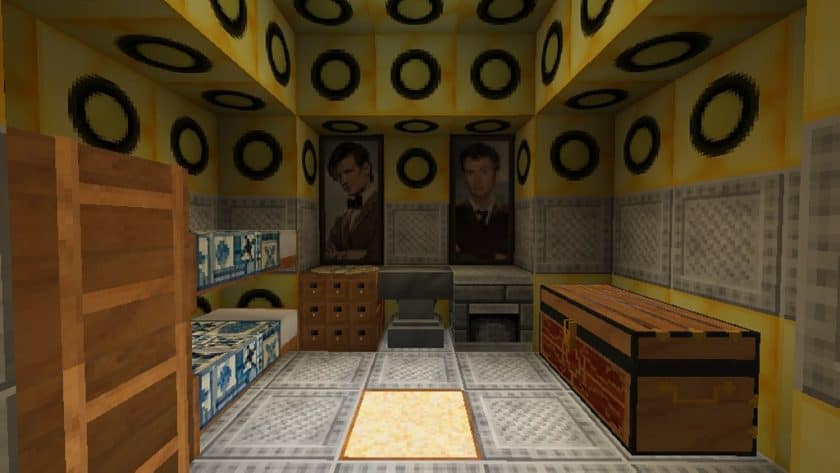
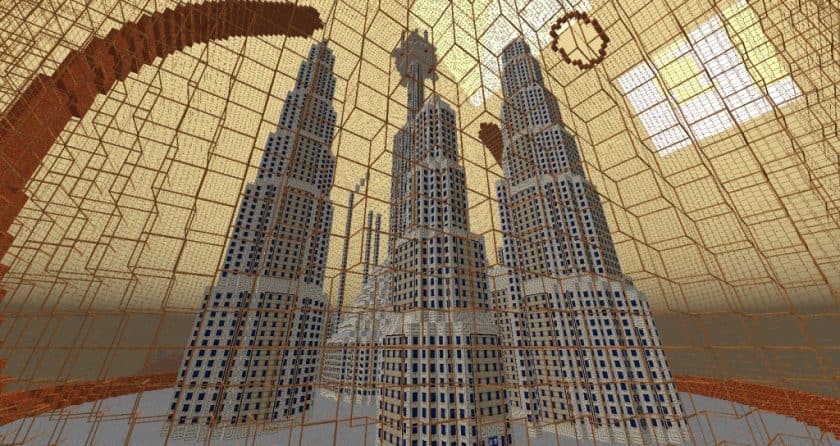
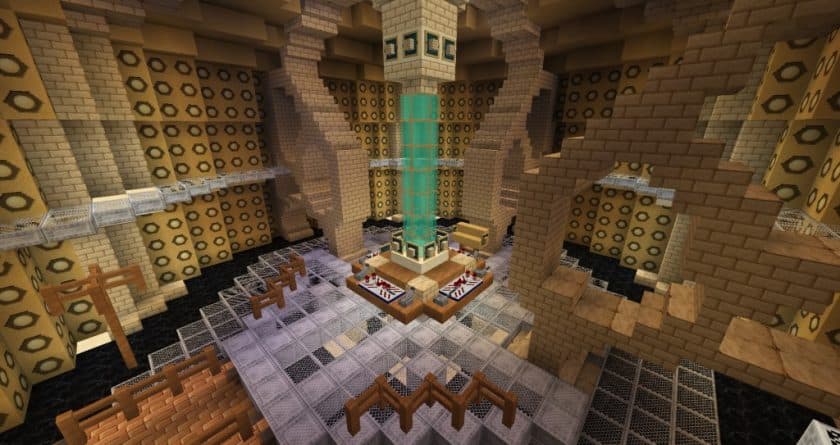
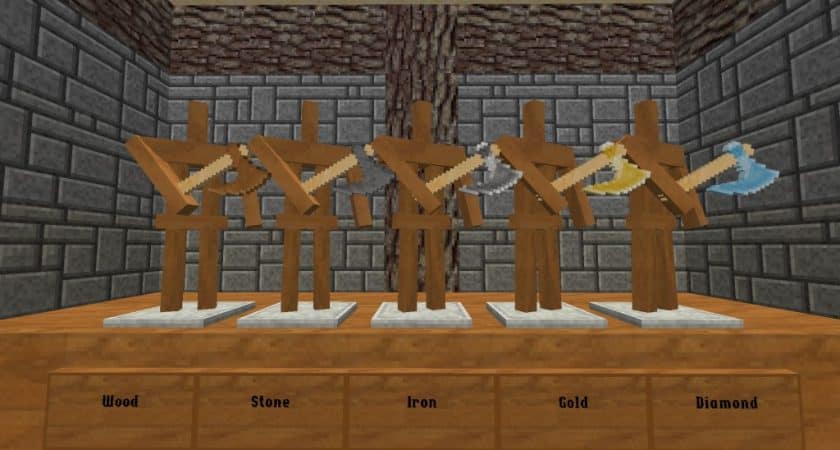
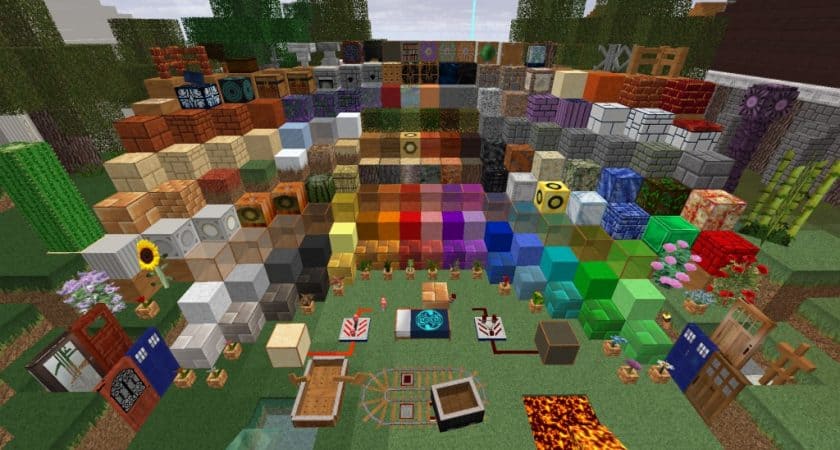
One of the most notable upgrades is the resolution bump from the standard 16x to a crisper 32x. This change isn’t just cosmetic; it introduces a significant layer of depth and intricacy to every block and item you encounter, making the environment feel more substantial and less pixelated. As I explored, I found myself marveling at the newly implemented blocks and items designed to replicate elements from the show. Imagine building your very own TARDIS, complete with its iconic blue phone booth exterior, or designing a detailed control room using new consoles, displays, and specialized crates. There’s a rich variety of new textures, from intricate bookcases to alien-looking plants, opening up countless possibilities for recreating beloved scenes or inventing new adventures.
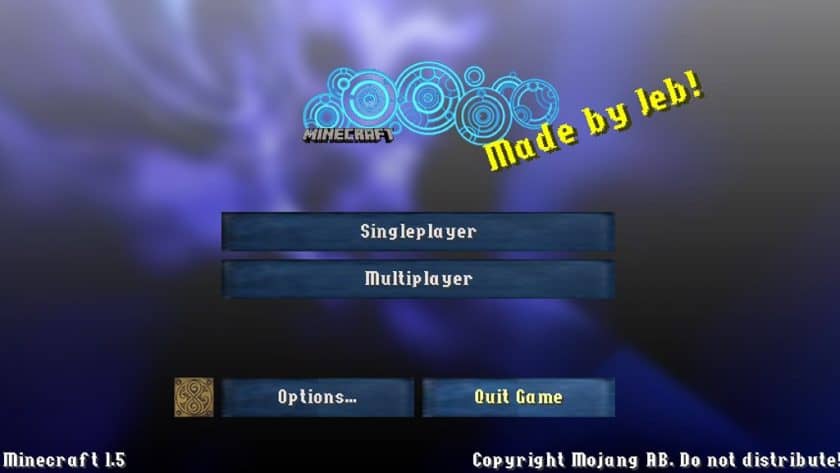
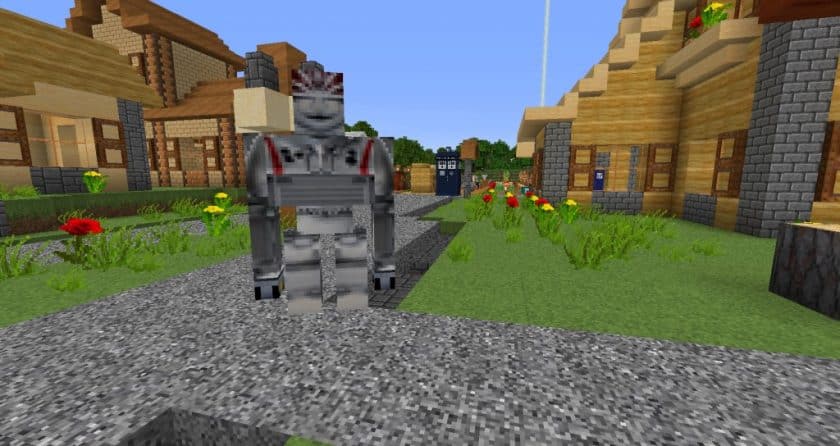
The immersion extends beyond just environmental blocks. The pack introduces new paintings featuring familiar characters, and even gives some mobs a fresh, Whovian-inspired look, subtly altering your interactions with the world’s creatures. Perhaps one of the most striking changes, and truly a fan service, is the complete overhaul of the player’s GUI and HUD. Gone are the vanilla interfaces, replaced with a sleek, dark blue design and a wavy background on the main screen, directly inspired by the show’s aesthetic. While the pack retains the original sky and water textures and doesn’t introduce linked or animated textures, this ensures a smooth performance experience, even with the enhanced resolution. For those playing on older systems, a 16x version is also available, ensuring that every Whovian can enjoy this meticulously crafted experience without performance worries. It’s a truly engaging way to blend two beloved universes.
| Minecraft Version | Compatibility |
|---|---|
| 1.10.2 | ✅ Supported |
| 1.10 | ✅ Supported |
| 1.9.4 | ✅ Supported |
| 1.9 | ✅ Supported |
| 1.8.9 | ✅ Supported |
| 1.8.8 | ✅ Supported |
| 1.8.1 | ✅ Supported |
| 1.8.6 | ✅ Supported |
| 1.8 | ✅ Supported |
| 1.7.10 | ✅ Supported |
| 1.7.9 | ✅ Supported |
| 1.7.4 | ✅ Supported |
| 1.7 | ✅ Supported |
| 1.6.4 | ✅ Supported |
| 1.6.2 | ✅ Supported |
| 1.5.2 | ✅ Supported |
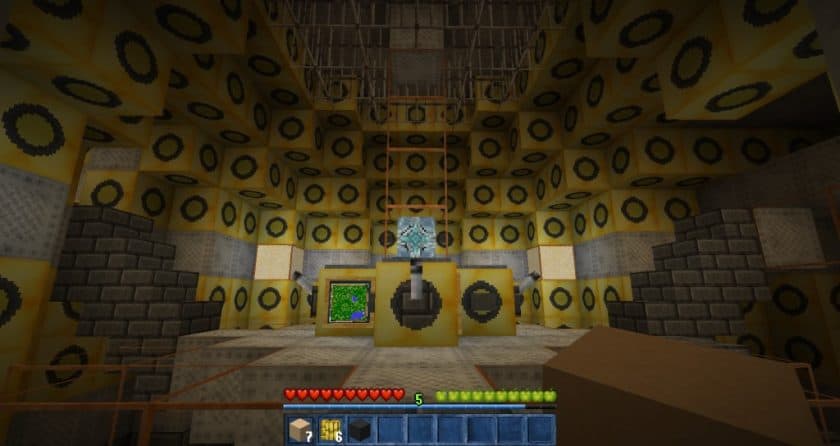
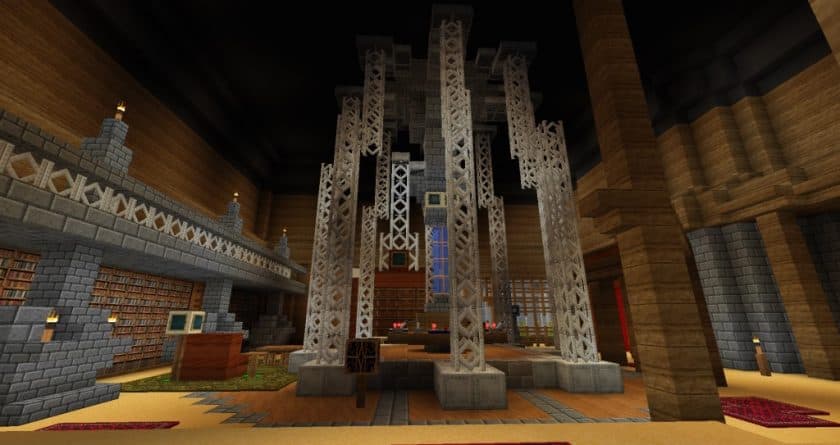
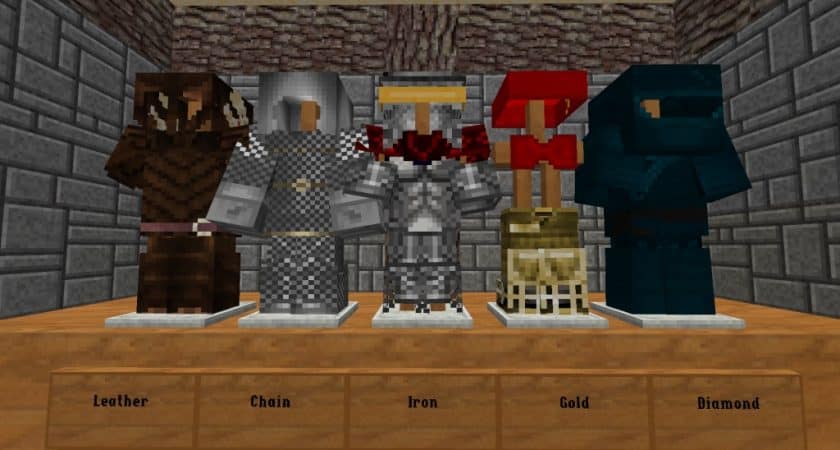
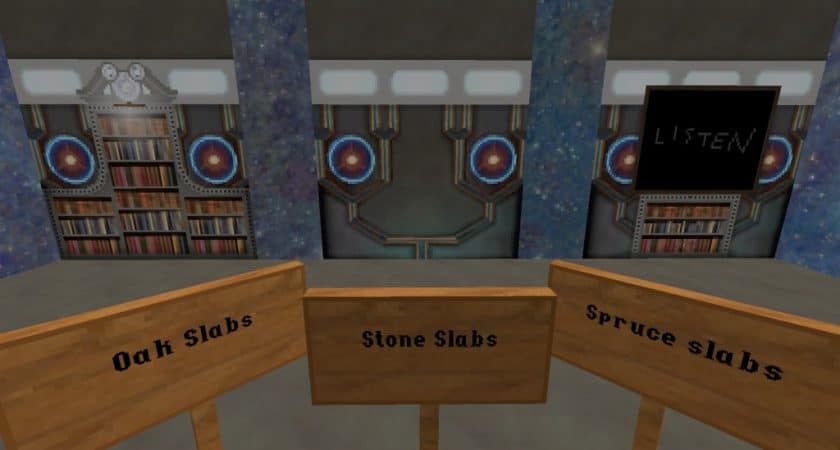
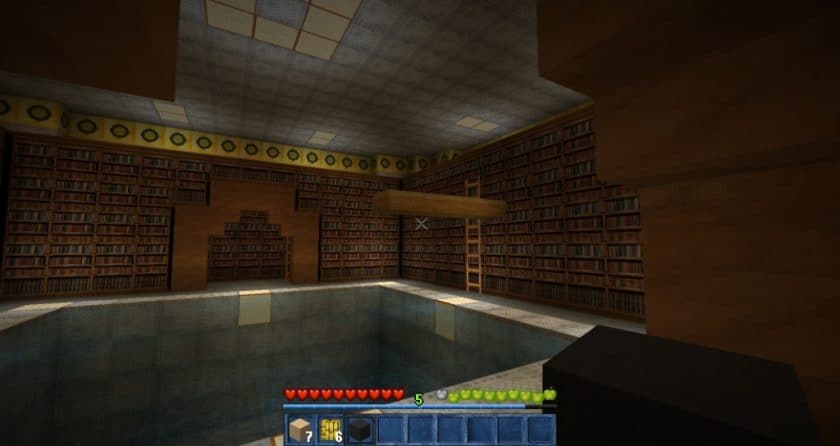
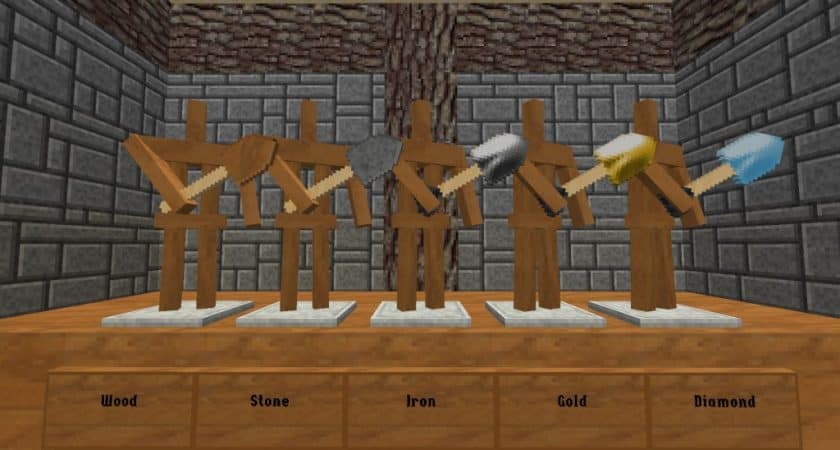
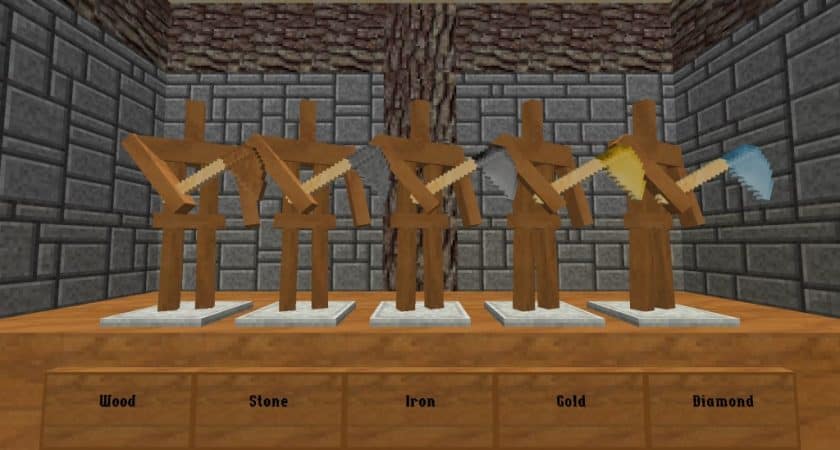
Doctor Whovian Resource Pack – Screenshots


How to Install Texture Pack (Simple 10 Steps)
- Download Optifine: Most of the texture packs and shaders need Optifine. That’s why, first download and install Optifine for the version of Minecraft you want to play.
- Download the Texture Pack: Get the texture pack you want from the download section. Choose the version that works with your Minecraft and your PC’s performance.
- Open Minecraft Launcher: Start Minecraft using the official game launcher – or even TLauncher, if you use that.
- Go to Options: From the main menu, click on the “Options” button.
- Open Resource Packs: Inside Options, click on “Resource Packs…”.
- Open the Resource Pack Folder: Click on “Open Resource Pack Folder” – this will open a folder named “resourcepacks”.
- Move the Pack File: Copy or move the .zip file you downloaded into that “resourcepacks” folder. (Don’t unzip the file – Minecraft uses it as-is!)
- Go Back and Refresh: Close the folder and click “Done”, then go back into “Resource Packs…” again.
- Activate the Pack: You’ll see the pack on the left side. Hover over it and click the arrow to move it to the right (active side). Tip: If you get a message that the pack is for a different version, just click “Yes” – it usually works fine.
- Click Done and Enjoy: Click “Done” again. Now your pack is ready to use in-game. It’s that easy!
Download
(32x) (1.10.x) Download The Doctor Whovian Resource Pack
(32x) (1.9.x) Download The Doctor Whovian Resource Pack
(32x) (1.8.x) Download The Doctor Whovian Resource Pack
(32x) (1.7.x) Download The Doctor Whovian Resource Pack
(32x) (1.6.x) Download The Doctor Whovian Resource Pack
(32x) (1.5.x) Download The Doctor Whovian Resource Pack
Official links:
Check out The Doctor Whovian Resource Pack on the official resource
Download Instructions
-
CurseForge: If the pack is hosted on CurseForge, the download will begin automatically after a few seconds. If it does not start, use the “Download” button shown on the page.
-
Modrinth: If the download is from Modrinth, click the file version that matches your Minecraft build, then press the Download button. Modrinth usually offers multiple releases, so make sure you pick the correct version before installing.
-
Mediafire: On Mediafire, click the large blue Download button to start the file download. Avoid any extra pop-ups or buttons that are not related to the direct download.
-
Google Drive: For Google Drive, click the small download icon at the top right corner of the page. It looks like a downward arrow. The file will be saved to your computer immediately.
Disclaimer We do not create or modify any of the texture packs or shader packs shared on this website. All credit goes to the original creators, and every download link we provide is the official link from their page, which keeps all downloads safe. Some links may stop working after updates, so if you find a broken one, let us know in the comments and we will update it quickly. If you like a pack, consider supporting the creator by visiting their official page or website that we have linked below, and feel free to leave a comment or vote to help their work reach more players.