Step into a uniquely dark and wonderfully macabre Christmas world with The Nightmare Before Christmas resource pack. Drawing profound inspiration from Tim Burton’s iconic film, this pack masterfully blends the spooky charm of Halloween with the festive spirit of Christmas, creating an atmosphere unlike any other in Minecraft. Forget cheerful and colorful; this experience is designed for players who crave a touch of eerie elegance and a hauntingly beautiful aesthetic for their holiday season adventures.
Developed by jsoft, this resource pack maintains the vanilla Minecraft resolution of 16x, ensuring broad accessibility without compromising game performance. Even on older systems, players can dive into this twisted festive realm without a hitch, enjoying smooth gameplay. However, for those seeking to amplify the pack’s inherent creepiness, pairing it with shaders is highly recommended. The subtle blur and atmospheric lighting effects that shaders introduce truly enhance the pack’s dark vibe, making the world feel even more mysterious and immersive.
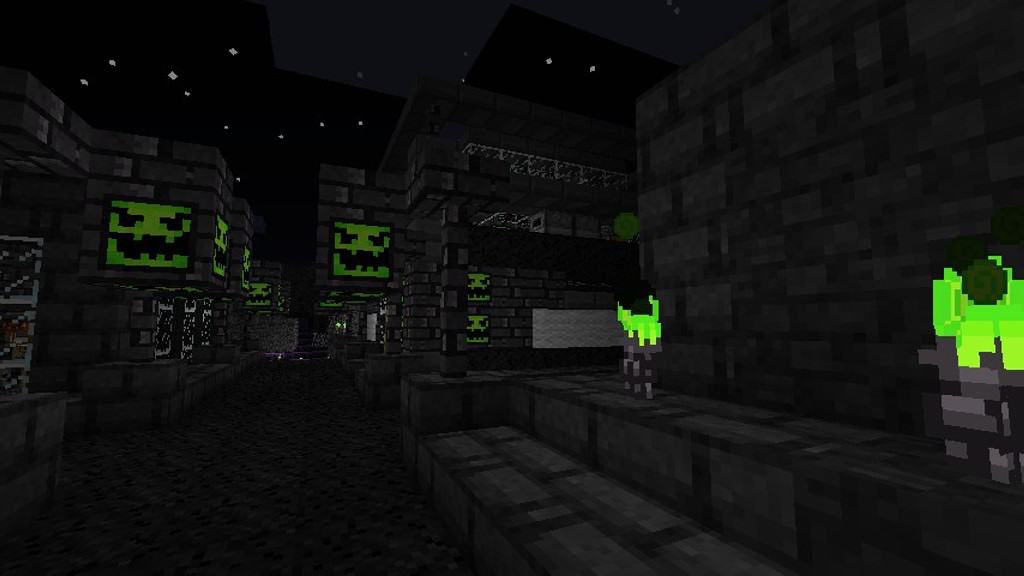
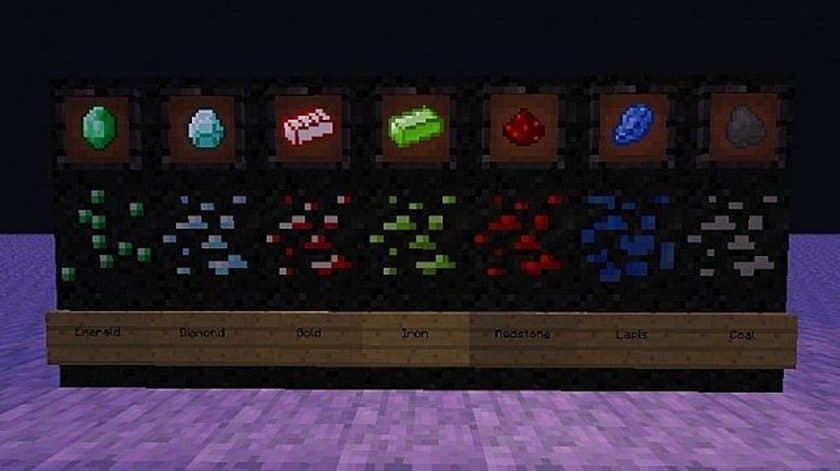
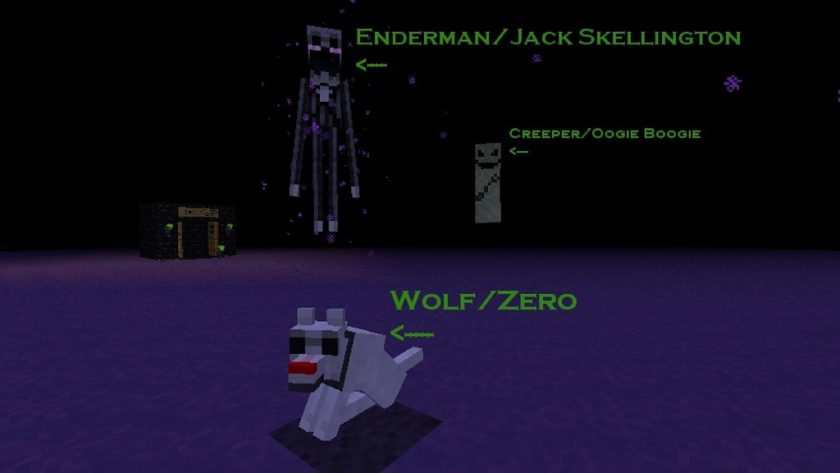
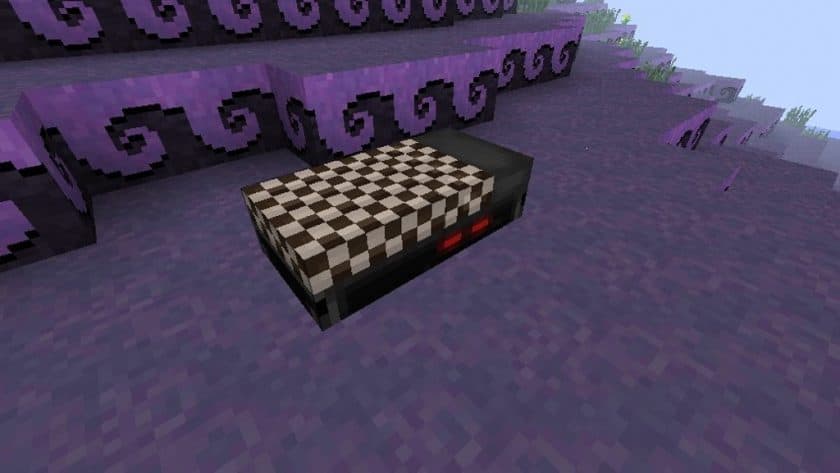
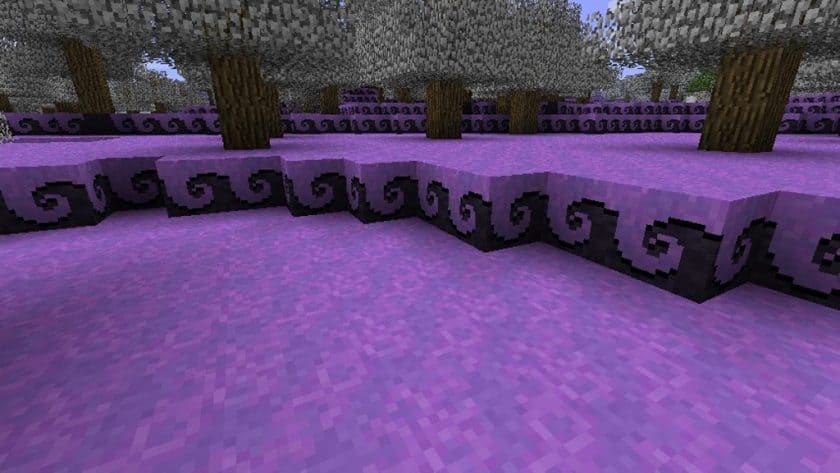
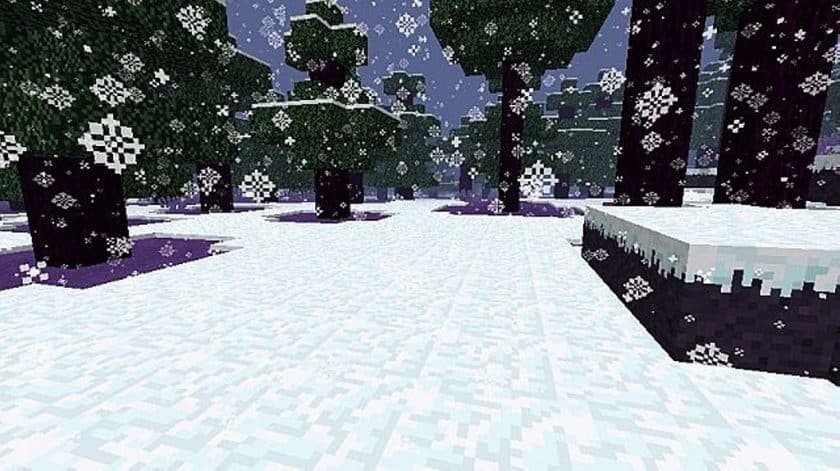
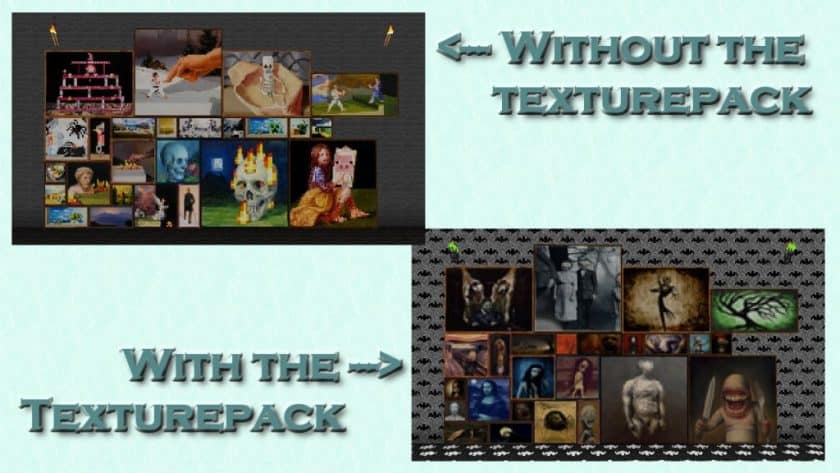
Visually, The Nightmare Before Christmas transforms your Minecraft experience with a host of new textures and thematic additions. You’ll encounter terrifying paintings that watch your every move, new window designs that hint at forgotten secrets, and unsettling green flames and fires that cast an otherworldly glow. Jack-o’-lanterns become prominent, blending seamlessly into this peculiar holiday setting. Plants and flowers are re-imagined with darker, almost withered textures, contributing to the desolate beauty. Beyond static blocks, the pack introduces new mobs, including a tall, slender figure reminiscent of Slenderman, adding an unexpected layer of fright to your explorations. With over 40 player skins available, ranging from a skeletal Santa Claus to zombies and scarecrows, you can truly embody the spirit of this unique world.
The attention to detail extends to functional elements as well. Armor and weapons receive a thematic overhaul, and even particle effects are given a spooky twist. The player’s HUD is redesigned with darker hues, complementing the overall aesthetic, and the main menu screen is transformed into a chilling entryway to your dark Christmas journey. Despite these comprehensive visual upgrades, the pack remains PvP friendly due to its 16x resolution, ensuring competitive play is unaffected. For optimal integration and additional visual enhancements, the resource pack is designed to work seamlessly with Optifine HD, leveraging its special features to introduce a custom sky, eerie clouds, and a larger, more prominent moon, all perfectly aligned with the pack’s haunting theme. Whether with or without shaders, this pack promises a deeply atmospheric and unforgettable Minecraft adventure.
| Minecraft Version | Compatibility |
|---|---|
| 1.10.2 | ✅ Supported |
| 1.10 | ✅ Supported |
| 1.9.4 | ✅ Supported |
| 1.9 | ✅ Supported |
| 1.8.9 | ✅ Supported |
| 1.8.8 | ✅ Supported |
| 1.8.1 | ✅ Supported |
| 1.8.6 | ✅ Supported |
| 1.8 | ✅ Supported |
| 1.7.10 | ✅ Supported |
| 1.7.9 | ✅ Supported |
| 1.7.4 | ✅ Supported |
| 1.7 | ✅ Supported |
Nightmare Before Christmas – Screenshots & Videos

How to Install Texture Pack (Simple 10 Steps)
- Download Optifine: Most of the texture packs and shaders need Optifine. That’s why, first download and install Optifine for the version of Minecraft you want to play.
- Download the Texture Pack: Get the texture pack you want from the download section. Choose the version that works with your Minecraft and your PC’s performance.
- Open Minecraft Launcher: Start Minecraft using the official game launcher – or even TLauncher, if you use that.
- Go to Options: From the main menu, click on the “Options” button.
- Open Resource Packs: Inside Options, click on “Resource Packs…”.
- Open the Resource Pack Folder: Click on “Open Resource Pack Folder” – this will open a folder named “resourcepacks”.
- Move the Pack File: Copy or move the .zip file you downloaded into that “resourcepacks” folder. (Don’t unzip the file – Minecraft uses it as-is!)
- Go Back and Refresh: Close the folder and click “Done”, then go back into “Resource Packs…” again.
- Activate the Pack: You’ll see the pack on the left side. Hover over it and click the arrow to move it to the right (active side). Tip: If you get a message that the pack is for a different version, just click “Yes” – it usually works fine.
- Click Done and Enjoy: Click “Done” again. Now your pack is ready to use in-game. It’s that easy!
Download
Download Instructions
-
CurseForge: If the pack is hosted on CurseForge, the download will begin automatically after a few seconds. If it does not start, use the “Download” button shown on the page.
-
Modrinth: If the download is from Modrinth, click the file version that matches your Minecraft build, then press the Download button. Modrinth usually offers multiple releases, so make sure you pick the correct version before installing.
-
Mediafire: On Mediafire, click the large blue Download button to start the file download. Avoid any extra pop-ups or buttons that are not related to the direct download.
-
Google Drive: For Google Drive, click the small download icon at the top right corner of the page. It looks like a downward arrow. The file will be saved to your computer immediately.
Disclaimer We do not create or modify any of the texture packs or shader packs shared on this website. All credit goes to the original creators, and every download link we provide is the official link from their page, which keeps all downloads safe. Some links may stop working after updates, so if you find a broken one, let us know in the comments and we will update it quickly. If you like a pack, consider supporting the creator by visiting their official page or website that we have linked below, and feel free to leave a comment or vote to help their work reach more players.