Stepping into a world enhanced by the Prisma Real Life resource pack is like pulling back a curtain to reveal a dimension where Minecraft’s blocky aesthetic meets breathtaking realism. Created by YTLiiked, this pack isn’t just an upgrade; it’s a complete reimagining, meticulously crafted to bring the natural world’s intricacies into your game. From the moment I loaded it up, the difference was striking. The vision behind Prisma Real Life is clear: to deliver graphics that are as close to real life as possible within the Minecraft engine, and it succeeds spectacularly.
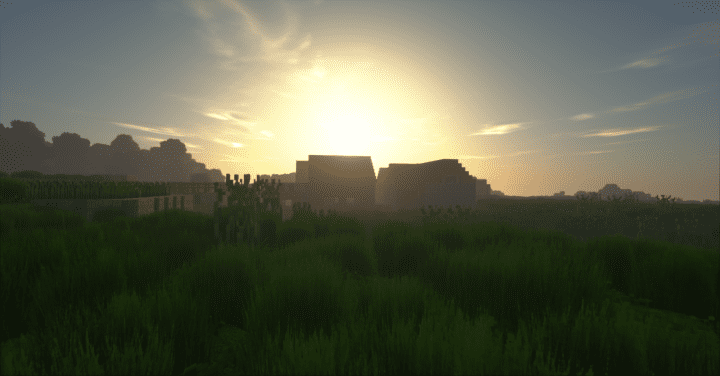
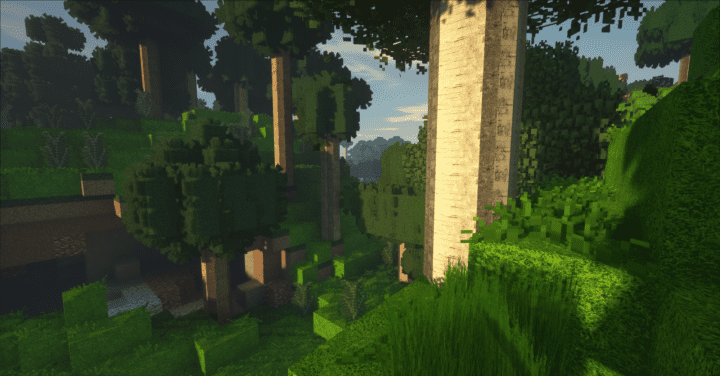
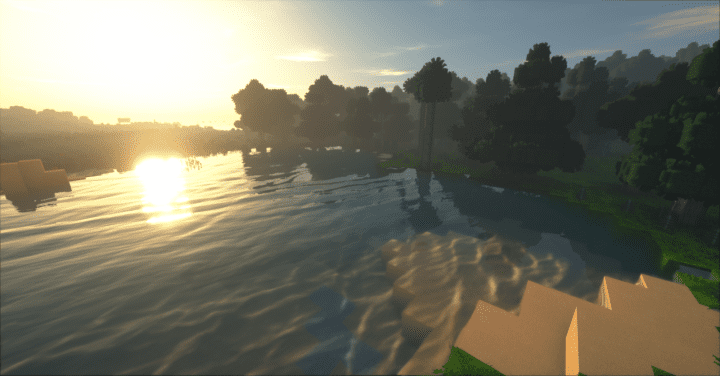
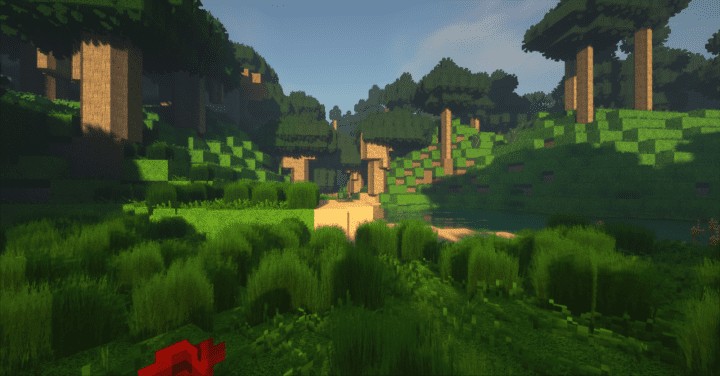
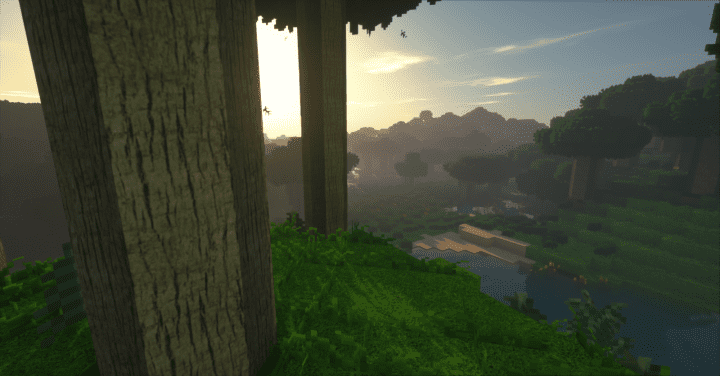
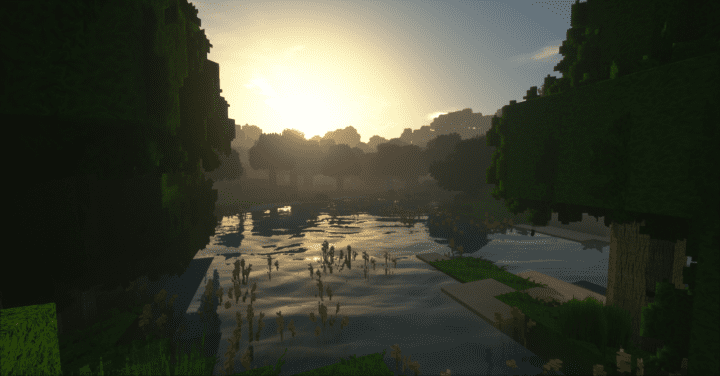
The immersive engagement this pack offers is truly unparalleled. While many resource packs aim for realism, Prisma Real Life sets itself apart through its exceptional detail and thoughtful implementation. Every block, every item, every environmental element feels purposeful and refined. The graphics aren’t just good; they’re outstanding, making the game feel fresh and vibrant. This isn’t just another texture overhaul; it’s an experience that makes you pause to admire the scenery, whether basking in the warmth of a sunrise or exploring the mysterious depths of a cavern. The robust color coding brings a vividness that makes the world pop, and the unprecedented level of detail ensures that even the smallest textures are brought to life with astonishing clarity.
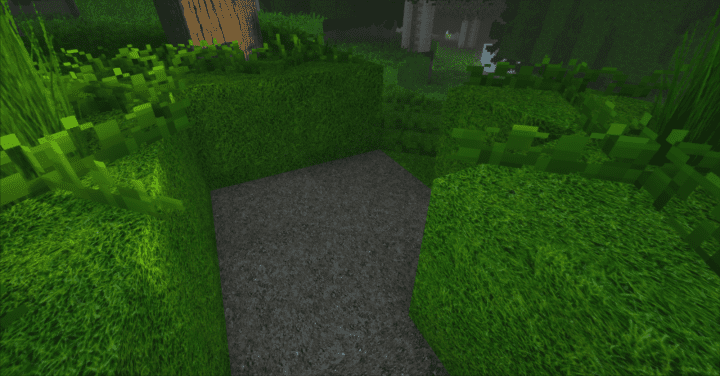
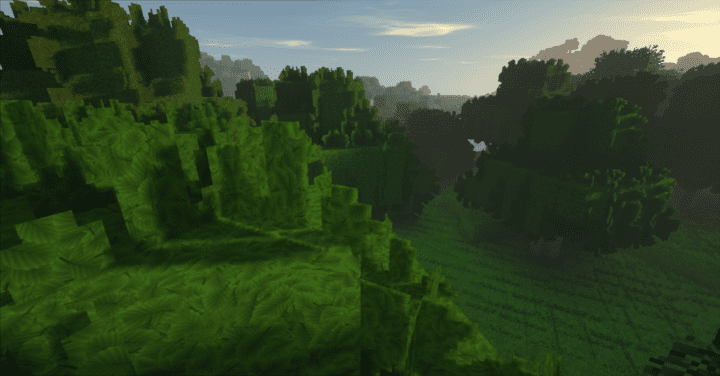
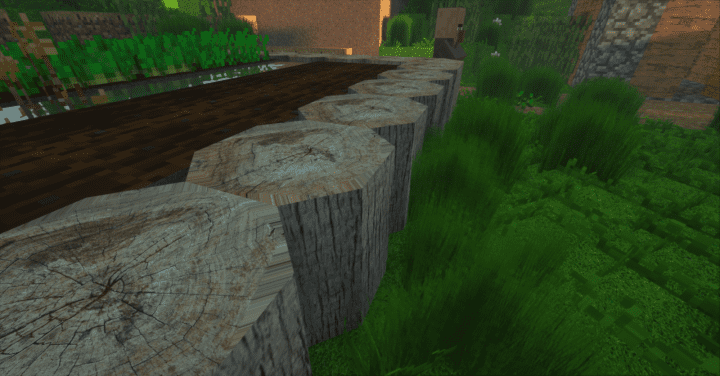
What truly impresses is the pack’s commitment to visual purity. The textures exhibit zero noise, resulting in incredibly clean and sharp visuals that eliminate any muddiness often found in lower-resolution packs. This finely honed look excites and inspires, encouraging exploration and creative building. Boasting a high resolution of 512×512, Prisma Real Life truly is a state-of-the-art resource pack, pushing the boundaries of what’s visually possible in Minecraft. However, a pack of this caliber naturally demands a capable hardware system. To fully appreciate its beauty and maintain a stable frame rate, a modern, powerful PC is essential. Without it, you might find yourself missing out on the smooth, magnificent experience this pack is designed to deliver.
| Minecraft Version | Compatibility |
|---|---|
| 1.13.2 | ✅ Supported |
| 1.13.1 | ✅ Supported |
| 1.13 | ✅ Supported |
| 1.12.2 | ✅ Supported |
| 1.12 | ✅ Supported |
| 1.11.2 | ✅ Supported |
| 1.11 | ✅ Supported |
| 1.10.2 | ✅ Supported |
| 1.10 | ✅ Supported |
| 1.9.4 | ✅ Supported |
| 1.9 | ✅ Supported |
| 1.8.8 | ✅ Supported |
| 1.8.1 | ✅ Supported |
| 1.8.6 | ✅ Supported |
| 1.8 | ✅ Supported |
Prisma Real Life – Screenshots

How to Install Texture Pack (Simple 10 Steps)
- Download Optifine: Most of the texture packs and shaders need Optifine. That’s why, first download and install Optifine for the version of Minecraft you want to play.
- Download the Texture Pack: Get the texture pack you want from the download section. Choose the version that works with your Minecraft and your PC’s performance.
- Open Minecraft Launcher: Start Minecraft using the official game launcher – or even TLauncher, if you use that.
- Go to Options: From the main menu, click on the “Options” button.
- Open Resource Packs: Inside Options, click on “Resource Packs…”.
- Open the Resource Pack Folder: Click on “Open Resource Pack Folder” – this will open a folder named “resourcepacks”.
- Move the Pack File: Copy or move the .zip file you downloaded into that “resourcepacks” folder. (Don’t unzip the file – Minecraft uses it as-is!)
- Go Back and Refresh: Close the folder and click “Done”, then go back into “Resource Packs…” again.
- Activate the Pack: You’ll see the pack on the left side. Hover over it and click the arrow to move it to the right (active side). Tip: If you get a message that the pack is for a different version, just click “Yes” – it usually works fine.
- Click Done and Enjoy: Click “Done” again. Now your pack is ready to use in-game. It’s that easy!
Download
Java Edition:
(512x) (1.13.x – 1.8.x) Download Prisma Real Life Resource Pack
Download Instructions
-
CurseForge: If the pack is hosted on CurseForge, the download will begin automatically after a few seconds. If it does not start, use the “Download” button shown on the page.
-
Modrinth: If the download is from Modrinth, click the file version that matches your Minecraft build, then press the Download button. Modrinth usually offers multiple releases, so make sure you pick the correct version before installing.
-
Mediafire: On Mediafire, click the large blue Download button to start the file download. Avoid any extra pop-ups or buttons that are not related to the direct download.
-
Google Drive: For Google Drive, click the small download icon at the top right corner of the page. It looks like a downward arrow. The file will be saved to your computer immediately.
Disclaimer We do not create or modify any of the texture packs or shader packs shared on this website. All credit goes to the original creators, and every download link we provide is the official link from their page, which keeps all downloads safe. Some links may stop working after updates, so if you find a broken one, let us know in the comments and we will update it quickly. If you like a pack, consider supporting the creator by visiting their official page or website that we have linked below, and feel free to leave a comment or vote to help their work reach more players.