Night Vision Resource Pack is designed for Minecraft players who want better visibility during nighttime and underground exploration without changing the game’s original textures. Instead of replacing blocks or increasing texture resolution, this pack adjusts the game’s lighting to make dark areas much easier to see. It preserves Minecraft’s vanilla appearance while removing one of the biggest frustrations of survival mode—limited visibility after sunset and inside caves.
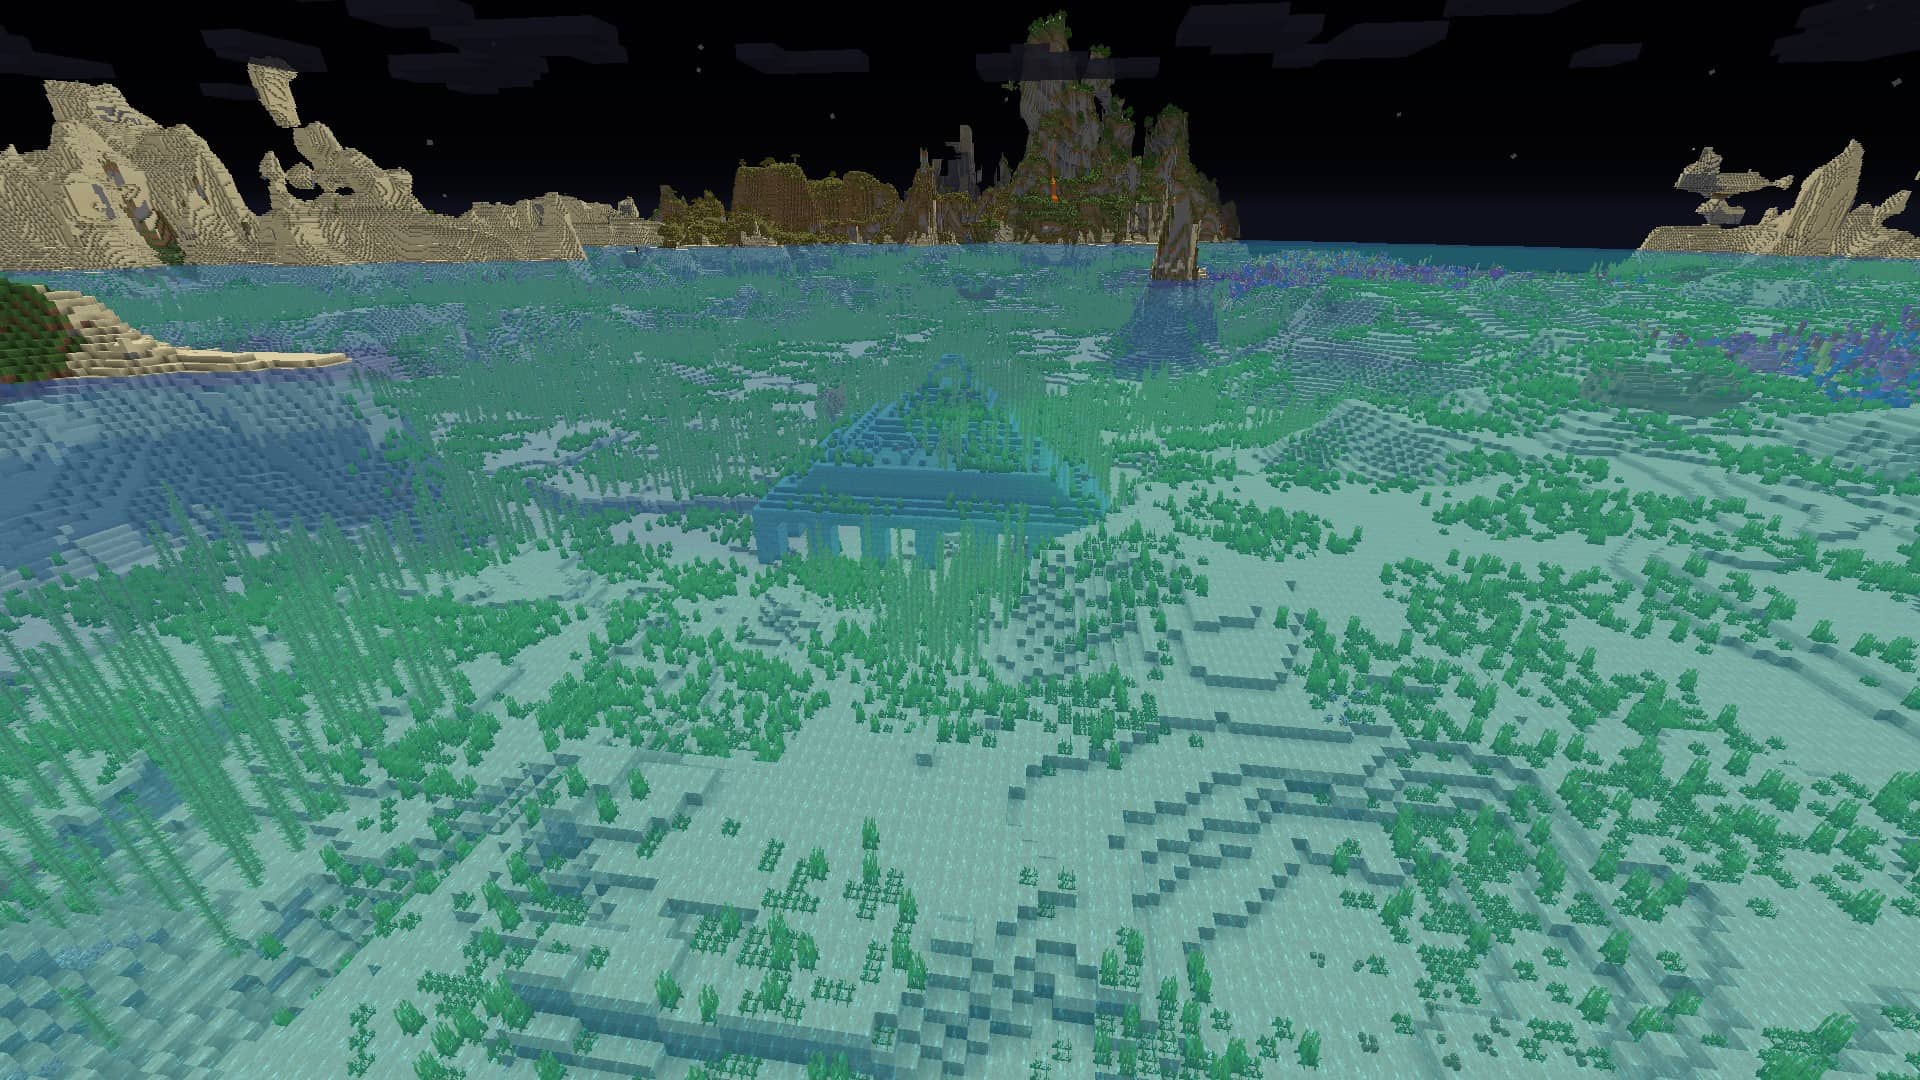
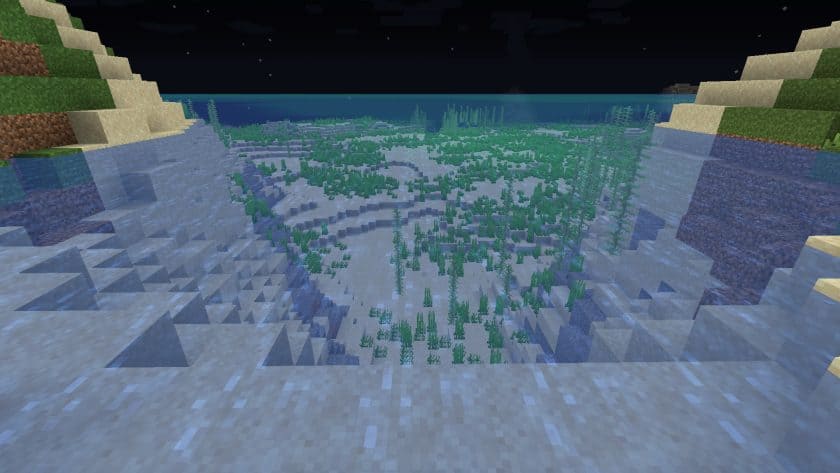
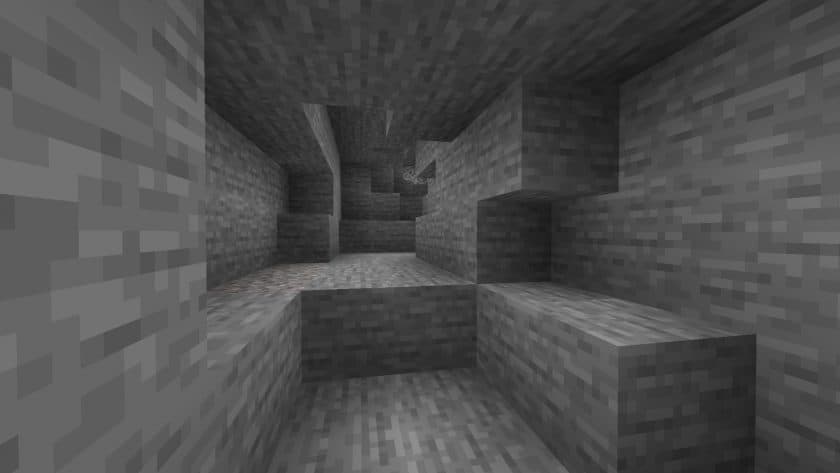
With Night Vision Texture Pack enabled, exploring caves, abandoned mineshafts, and underground tunnels becomes much more comfortable. Ores, blocks, and hostile mobs are easier to spot, allowing players to mine, build, and explore without constantly relying on torches or the Night Vision potion effect. The world still follows Minecraft’s normal day and night cycle, but the darkness is greatly reduced, creating a brighter and more enjoyable gameplay experience. This improvement is especially helpful for survival players, PvP enthusiasts, and anyone who spends a lot of time exploring underground.
Another advantage of Night Vision Resource Pack is that it only modifies lighting rather than textures, making it lightweight and performance-friendly. It can be used alongside most texture packs without affecting their appearance, although it is generally not compatible with shader packs because shaders control their own lighting system. Whether you’re exploring dangerous caves, searching for diamonds, or simply prefer a brighter Minecraft experience, the Night Vision Resource Pack offers a practical quality-of-life improvement while keeping the familiar vanilla style intact.
| Minecraft Version | Compatibility | Recommended Resolution |
|---|---|---|
| 26.1.2 | Supported | 16× |
| 26.1.1 | Supported | 16× |
| 26.1 | Supported | 16× |
| 1.21.11 | Supported | 16× |
| 1.21.10 | Supported | 16× |
| 1.21.9 | Supported | 16× |
| 1.21.8 | Supported | 16× |
| 1.21.7 | Supported | 16× |
| 1.21.6 | Supported | 16× |
| 1.21.5 | Supported | 16× |
| 1.21.4 | Supported | 16× |
| 1.21.3 | Supported | 16× |
| 1.21.2 | Supported | 16× |
| 1.21.1 | Supported | 16× |
| 1.21 | Supported | 16× |
| 1.20.6 | Supported | 16× |
| 1.20.5 | Supported | 16× |
| 1.20.4 | Supported | 16× |
| 1.20.3 | Supported | 16× |
| 1.20.2 | Supported | 16× |
| 1.20.1 | Supported | 16× |
| 1.20 | Supported | 16× |
| 1.19.4 | Supported | 16× |
| 1.19.3 | Supported | 16× |
| 1.19.2 | Supported | 16× |
| 1.19.1 | Supported | 16× |
| 1.19 | Supported | 16× |
| 1.18.2 | Supported | 16× |
| 1.18.1 | Supported | 16× |
| 1.18 | Supported | 16× |
| 1.17.1 | Supported | 16× |
| 1.17 | Supported | 16× |
| 1.16.5 | Supported | 16× |
| 1.16.4 | Supported | 16× |
| 1.16.3 | Supported | 16× |
| 1.16.2 | Supported | 16× |
| 1.16.1 | Supported | 16× |
| 1.16 | Supported | 16× |
| 1.15.2 | Supported | 16× |
| 1.15.1 | Supported | 16× |
| 1.15 | Supported | 16× |
| 1.14.4 | Supported | 16× |
| 1.14.3 | Supported | 16× |
| 1.14.2 | Supported | 16× |
| 1.14 | Supported | 16× |
| 1.13.2 | Supported | 16× |
| 1.13.1 | Supported | 16× |
| 1.13 | Supported | 16× |
| 1.12.2 | Supported | 16× |
| 1.12 | Supported | 16× |
| 1.11.2 | Supported | 16× |
| 1.11 | Supported | 16× |
| 1.10.2 | Supported | 16× |
| 1.10 | Supported | 16× |
| 1.9.4 | Supported | 16× |
| 1.9 | Supported | 16× |
| 1.8.9 | Supported | 16× |
| 1.8.8 | Supported | 16× |
| 1.8.1 | Supported | 16× |
| 1.8.6 | Supported | 16× |
| 1.8 | Supported | 16× |
| 1.7.10 | Supported | 16× |
| 1.7.9 | Supported | 16× |
| 1.7.4 | Supported | 16× |
| 1.7 | Supported | 16× |
Note: Night Vision is a 16× resource pack designed to improve visibility in dark environments. The Recommended Resolution column is set to 16×.
Night Vision — Screenshots

How to install Night Vision Resource Pack:
- Most source packages require Optifine, so be sure to download and install it. – a general recommended step for all packages, Optifine is also needed for most shaders
- Download the Night Vision texture pack for Minecraft from the download section below. – if there are many different versions, just choose the one you like, is compatible with your version/edition of Minecraft that you think your computer can handle in terms of performance.
- Launch the game client via the Minecraft launcher.
- Click “Options” in the main menu.
- Click on “Resource Packs…” from the options menu.
- Click “Open Resource Pack Folder”—a folder named “resourcepacks” will appear.
- Move the .zip file you downloaded in the first step into the newly opened “resourcepacks” folder.
- Click “Done.”
- Click on “Resource Pack…” again.
- Your package should appear in the left window; just hover over it and click on the arrow pointing to the right.
QUICK TIP: Sometimes when activating a pack, the game may say that the pack is made for a newer or older version of Minecraft. This is just a warning; it doesn’t affect your game in any way, and you can still activate and enjoy the pack by just clicking “Yes” when prompted.
- Click “Done” again.
- The package has now been successfully loaded and is ready to use in your world!
- Cartenavigom is credited with creating Night Vision.
- We never modify resource packs in any way. None of the resource packs, shader mods, or tools you see on this site are hosted on our servers. We only use official download links provided by official authors. Therefore, they are completely safe.
- Since the links are official and we update them manually, the links may stop working with each new update. We try to update the links as fast as possible and usually we update everything on time and users don’t have any problems, but if suddenly any link stops working, let us know through comments below.
- Don’t forget to leave a comment below and vote for the pack. In this way, you will help the authors to constantly improve the project. If you want to support the author(s), be sure to check the author links right below the download links.
Night vision texture pack download
Java Edition:
[16x] [26.2.x – 1.21.2] Download Night Vision Resource Pack
[16x] [1.21.1 – 1.13.x] Download Night Vision Resource Pack
[16x] [1.12.x – 1.7.x] Download Night Vision Resource Pack
Curseforge: the download starts automatically after a few seconds;
Mediafire: click the big blue button with the text “DOWNLOAD”;
Google Drive: in the top right corner, you will see a small download icon (down arrow); click it, and the download should start.